There’s something special about creating a homemade gift for your mom. Making a gift from recycled materials is not only eco-friendly but also a wholesome alternative to getting caught up in marketing campaigns to ‘buy more stuff’.
Crafting a unique gift also allows you to tailor the gift to your mom’s individual tastes and interests.
In this blog post, I’ll provide some creative and unique homemade gift ideas for those looking for simple heartfelt projects, to more advanced DIY creations for seasoned crafters. Also, if DIY isn’t your thing but you’d like to give handmade-made gifts, I’ve included some links to Australian sellers on Esty who use recycled materials.
These personalised coasters are a relatively quick and easy Mother’s Day gift. All you need is some small tiles, glue or modge podge, photos and felt. Leftover tiles can often be picked up for next to nothing at salvage yards.
Alternatively, wood offcuts can be used for the base. Pallet wood can be cut down to small squares or, for round coasters, cut tree branches into thin slices.
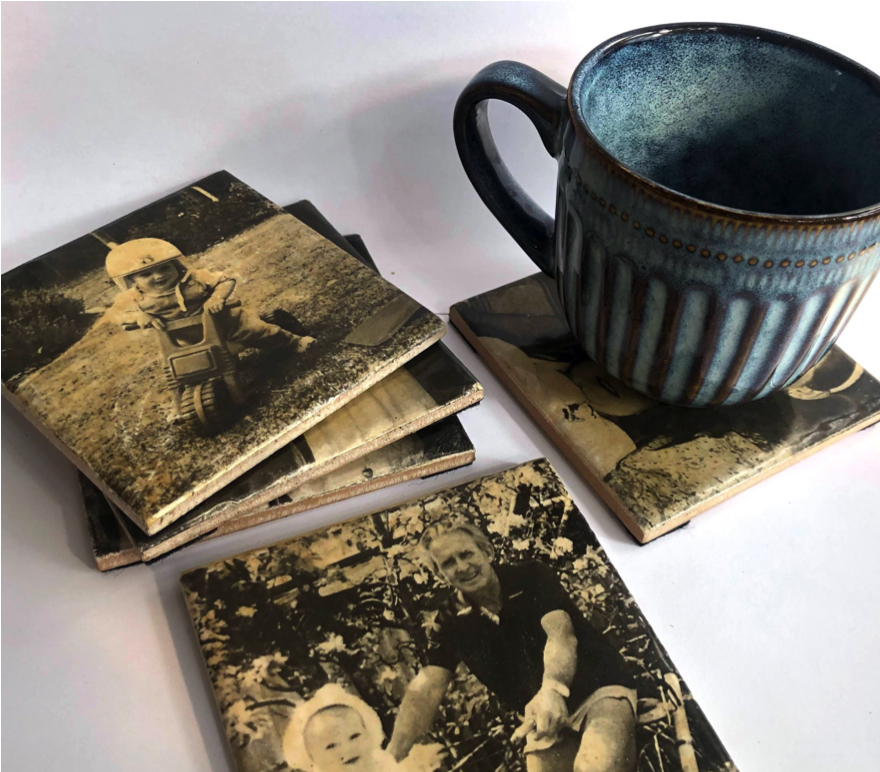
There are a couple of ways to apply the photo to the tile by decoupage or ink transfer. I personally think decoupage is the more foolproof option, this involves glueing the photo directly to the tile and then sealing.
I decoupaged the tiles on the left and the wood coasters below were transferred with modge podge (by CleverPoppy).
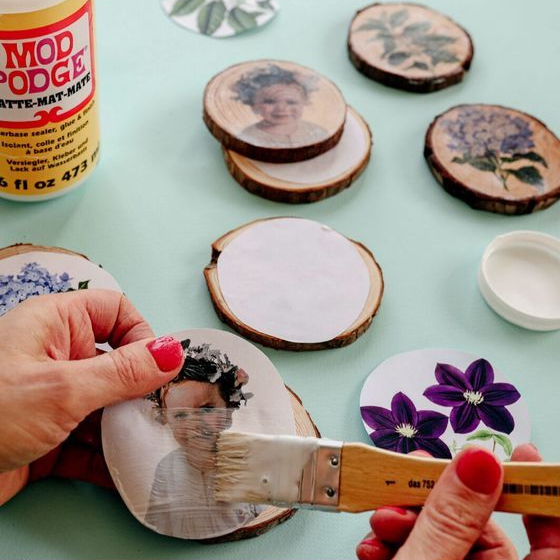
There are a few different ways to transfer images from photo paper like acetone, wax paper, photo transfer paper and modge podge.
Photo transfer with modge podge
Decoupage method
The decoupage method follows the same method as using Modge Podge with a few minor differences.
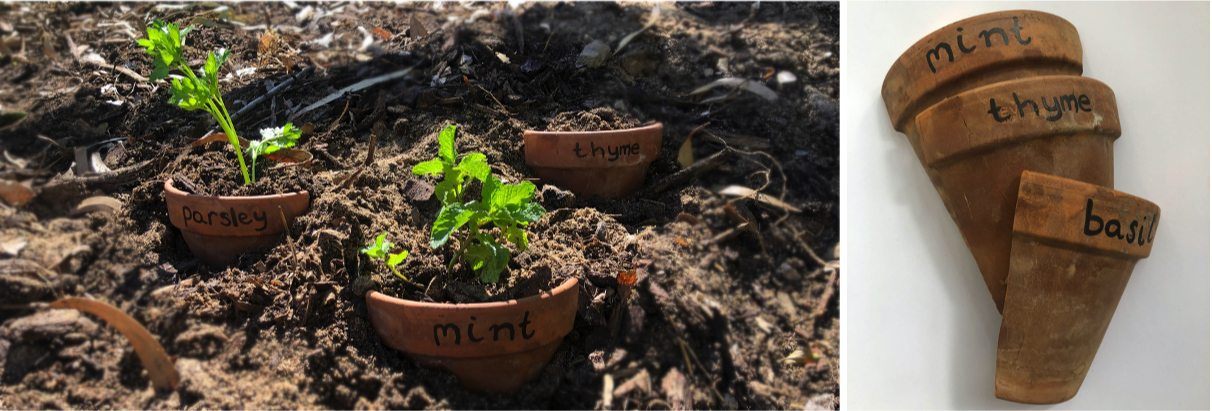
Rather than throwing out broken pots, add a label with chalk paint or a sharpie and use them for herb garden labels. I find that my plants always tend to dry out in terracotta pots so I was happy to find an alternative use for them!
I scored the pots first with an angle grinder so they broke into 3 parts rather than risk breaking the pots into smithereens with my overly enthusiastic hammer skills. While this might seem like too much effort for some, I’m always looking for an excuse to get out the power tools 🙂

The upcycled spoon herb labels above are handmade by Australian Etsy seller, JFVintageArt.
To DIY this project you’ll need a set of metal stamps and some second-hand spoons. A quick look on Gumtree and Facebook Marketplace found 3 second-hand metal stamp sets for sale in my area so, I’ve put this project on the to-do list and will update the post when I try out this DIY project with my tips & tricks!
Flowers are always a great Mother’s Day gift. Instead of splurging on a bouquet from the florist this Mother’s Day, get creative and put together a bouquet with flowers from a wholesaler, markets or a friend’s garden then gift in an upcycled vase.

Diane from InMyOwnStyle cleverly made these budget friendly vases in 10 minutes with a couple of pickle jars, tape and some left over house hold paint. Small jars can be direct dipped and larger jars can be taped to create a clean edge and painted.
Tip: To check if the glass needs sanding first for better adhesion, paint a small section on the bottom of the jar and let dry. If the paint scratches easily when dry, use a fine sand paper (ie 120 grit) and give the glass a light sanding to rough up the surface before painting.
Vases come in and out of fashion so taking something that is a bit out of date and giving it a facelift is a great idea to save some pennies.
This unglazed earthenware look is a clever bi-carb and paint hack to upcycle glass vases. Have a rummage through the back of your kitchen cupboard or head to a local second-hand store to see what interesting shapes and textures you can find.
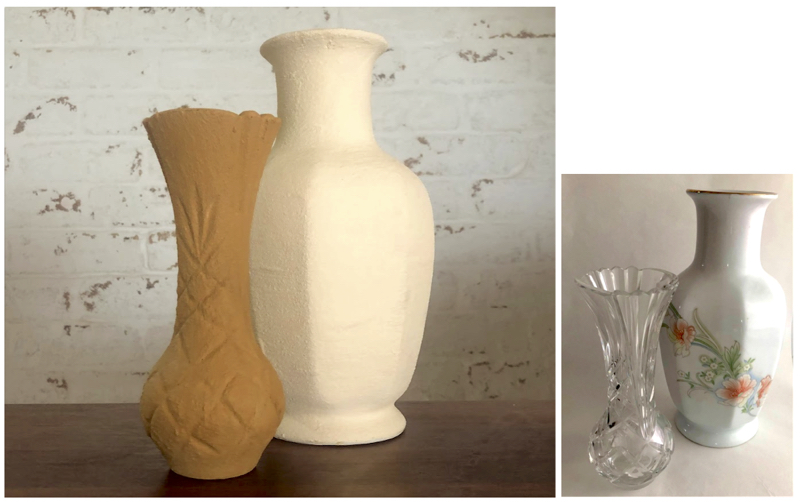
I used about one tablespoon of bi-carb soda to three tablespoons of paint. The more bicarb soda added, the rougher the texture. The paint stuck surprisingly well and doesn’t feel like it will easily chip or rub off but I also lightly sanded the vases with sandpaper first to help the paint stick.
Recycled wine bottles can make stylish outdoor citronella candle holders for keeping mosquito’s away!
Cutting glass takes some practice so have a few bottled spare to test different methods.

The most common way to cut wine bottles is by using a handheld glass-cutting tool. These can be bought at Bunnings for less than $10.
The tool has a small cutting disc that scores the glass then, the bottle is broken by stressing the glass from hot to cold with hot water and ice. My results have been very hit and miss when I’ve tried this in the past so I opted for a different method.
These bottles were cut with an electric tile saw. This is something I already had in the shed from cutting tiles for my bathroom renovation. I measured up from the base of the bottle about 15cm and marked with a sharpie all the way around.
It’s a lot faster than using a glass cutting tool but gives a very coarse edge that needs to be sanded down. I used a sanding flap disk on an angle grinder and then flattened it off with an electric sander.
Before gluing the two parts together give each surface a light sanding to help the glue adhere to the glass, I used a 2 part epoxy glue.
These little wine glass personalisers are a great gift for mums who like to entertain, and help guests keep track of which glass is theirs at the next BBQ or big family get together!
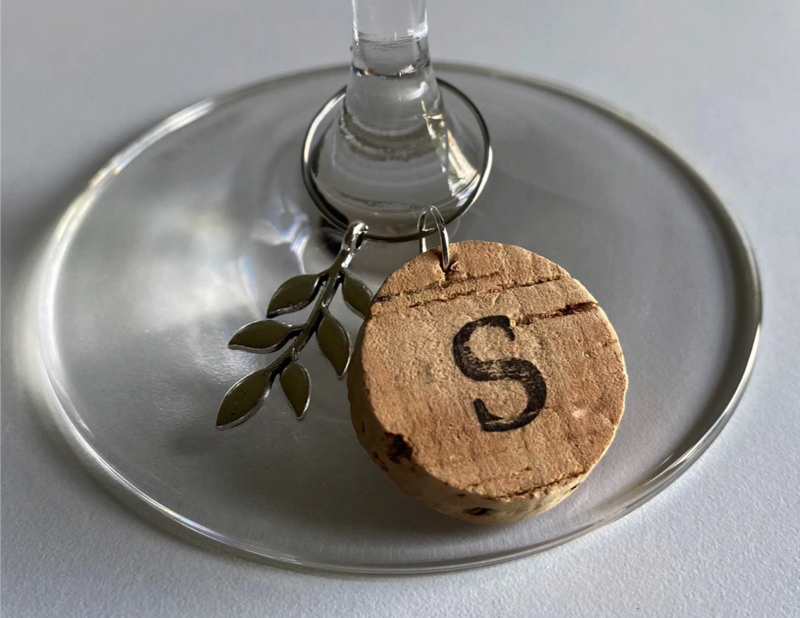
The cork wine glass charm above is from Etsy crafter MayCharmsAU but there are lots of different recycled materials that can be used for this project.
Rummage through your jewellery box for pieces that are broken, earrings that have lost their partner or jewellery that has gone out of style to create unique little charms.
If you have old board games that are missing pieces you can re-use scrabble tiles so people can choose the wine charm with their initials or recycle puzzle pieces and paint them to make each one unique!
There are so many interesting things that can be cleverly recycled into upcycled jewellery. If your mum loves eclectic, interesting jewellery then this could be a good option for Mother’s Day.

This clever project from The How to Home. The memo board is made from recycled pallet wood, copper pipe, a couple of paint sticks (or thin wood offcuts) and a roll of craft paper.


A super easy and quick alternative way to make a memo board is to upcycle an interesting frame. This is also a good way to repurpose a frame that has broken or missing glass.
Take out the backing board from the frame and add a layer of corkboard or wrap it with fabric. Add some pins, photos and bulldog clips for a practical, homemade memo board!

Organising a bookshelf by colour is weirdly satisfying but the visual impact of such a simple task is impressive. Take bookshelf organising one step further with some one-of-a-kind, handmade bookends.
Most interesting objects can be turned into a bookend by attaching them to a simple L-shaped frame, these can be bought from Officeworks (or get creative and rummage at your local salvage yard for a recycled alternative.)
If you love upcycling and DIY projects you may also be interested in: